10.09.2011

Another Craft Tutorial for the Re-ment Meeting!

The Re-ment meeting was a blast yesterday at Robin Gee's house in LA. There were again tons of prices and giveaways and non-stop fun and laughter the whole day. Robin has outdone herself again! Also during the meeting, my good friend Caroline Swing made an excellent demonstration on how to repaint Re-ments and I had another miniature craft presentation. :)

The theme for the event was 'Kawaii' - the Japanese for 'Cute'. ^^ I realized from the last meeting that not all participants are crafters, so I opted for a no glue and no scissor cutting kind of craft. Which led me to making an origami project with a twist.

I decided to make use of Lucky Stars. Lucky stars are folded strips of paper shaped into a star that you can put in jars and make a wish when you've made 100 or 1000 pcs. It is said to bring you goodluck. Although some people think the 'quality' of your wish varies from the quantity you make. ;P

Anyhow, back to our tutorial, I turned the lucky stars into a kawaii mini decor. I guess it's something you don't really see in real life, but it is kawaii nonetheless. ^^ It kinda reminds me of those bouquet or balloon gift arrangements. Here is a sample picture of the craft I had the Re-ment addicts make yesterday.


For the First Step of course, you need to prepare your materials. I created kits again for the presentation and the picture below shows what's inside a kit. It is composed of fairly simple materials that you can find anywhere.


A. The paper strips are pre-cut and can be bought in Japanese stationary stores or online. You can buy them for like 99cents for a 100pcs or something, or you can just make your own by cutting scrapbook paper, gift wrappers, etc.

B. The candy looking thing is actually just a piece of clay that I wrapped so it wouldn't damage the paper strips incase it bleeds oil in the kit.

C. The small plastic cup is actually tattoo ink cups that I just got from Ebay for really cheap. I found the #16 size to be the perfect size for this project. You can also use other miniature containers you can find or even bottle caps.

D. The small sticks are just toothpicks. The blue string is a plastic ribbon.

Here is the video of the tutorial.


Here are pics of this craft project used in dioramas. You can see it at the end of the video, but I thought I should post the actual pics too. ^_^


Enjoy!


*By the end of the event. I was convinced that the Lucky Stars do work! I won 2 raffle prizes at the meeting! ^_^


9.26.2011

How to Make a Miniature Notebook

I just thought of finally posting this tutorial online. I originally created it on power point as a short craft workshop/presentation for the Re-ment Fan Club Meeting last March. I made small craft kits for everyone, so they can make their own mini notebooks as I walk them through the tutorial during my presentation.

Here is my staff creating the kits. ^_^

I turned the presentation into a movie clip, but sorry it doesn't have words. I thought it would at least give an idea on how this little notebook is made. I guess I should call it a demonstration rather than a tutorial huh? Is there really a difference?
 

Here is a picture of the materials. You can make it any size you wish. The DISTANCE GUIDE is any material that's around 2mm thick. I included it just so people would have an idea on how far away the card stocks should be from each other. You can just eyeball the distance if you like.

For the card stock I actually used a bristol board, but you can always recycle cereal boxes or other 0.5-1mm thick cardboard you can find.

I use wood glue most of the time as it dries a little faster than ordinary glue. Since it dries faster, the less the paper absorbs it, the less wrinkle it creates.


I chose to use Washi paper since you can never go wrong with washi, but you can use any pretty paper you want. Just try to use less glue if you're using ordinary paper as the glue will wrinkle the paper (which is rarely a problem with washi paper).

HERE IS THE VIDEO TUTORIAL


And for the last step....use them in your dioramas!


Enjoy! :)

If you have any questions, feel free to send me a message or leave a comment.

Please join my Facebook Like page

9.24.2011

My Green Guy Series Blog


I created another blog for my Green Guy Series. Please drop by and say hi! Green Guy will be happy to see you! ^_^

Click here to see Green Guy and his friends

9.05.2011

FACEBOOK LIKE PAGE

By the way,  I post more often and more pics in my Facebook Like Page. If you're also an FB addict please Like me!!! ^_^ Thanks!

You'll also see my "Kawaii Stuff" / "Green Guy Series" there. Here is a sample.

Introducing GREEN GUY and his Gang...

After hours of Green Guy's continuous begging and pestering, Totoro finally decides to bring them to his secret magic place - the convenience store.


You can also see them in My Flickr 

The Little Penthouse

This is the set for trade that I mentioned on my past post. I promised a friend awhile ago that I'll trade with her but it has been put on hold as I haven't been making miniatures regularly. So finally, I just decided to trade this 3rd set that I finished.

As you probably have noticed, I am a fan of white furniture. Even my work station at home is all white. There's just something about it that makes your mind feel fresh and serene. I believe white also makes clutter look minimal and I love small knick-knacks in real life and in miniature. :)


See more pictures in My Flickr


This might be the last set I make for now and will resume again by mid October. So I'll probably post again around that time. Cya then! ^^ 

The Quirky Room

I saw the 'Patch Sofa' by Creative Affairs and completely fell in love with it. I knew it was going to be tedious work to make it in miniature, but I just had to make one. It was modern but kinda "Etsy-ish". Which is the style I'm fascinated with at the moment. I ended up making 2 sections on the sofa instead of 3. Later on I'll probably make a 3 section for my own personal collection.

Here is a picture of the original Patch Work Sofa (not my picture)


However, making the look of the room was not easy. The different patterns on the sofa was quite a challenge to pair with walls and other accessories and make it look eye pleasing for the pictorial. No matter what I did, it felt like there was something missing. Luckily, I remembered Yoshitomo Nara's artworks and thought it would be perfect to complete the look! ^_^


more pictures in my Flickr

The Loft

I made 3 Sets this month. Actually I've made the wood parts awhile ago, but I've been busy with some graphic projects that it took awhile to complete these sets. 2 of the Sets are going to be listed in my Etsy Shop this week. 1 set is for trading with a friend. I'm getting a Lati Yellow from her! Weee! New addition to my QC team. ^^

Without further ado. Here are the new Loft pics!

THE LOFT


See more pictures in MY FLICKR

4.30.2011

Dining Set 2

Just completed a new dining set that consists of a square dining table, 2 Eero Saarinen Tulip chairs that are reupholstered in gray fabric and a butchers block (or shelf) with a couple of basket weave boxes and other accessories.

It is now listed in My Etsy Shop !


Here are some pictures for you to enjoy. :D


More pictures on my Flickr page

4.22.2011

Desk Set Completed!

I listed the Desk Set last night before going to bed and Chris a Flickr friend purchased it this morning! Lol. I will make another set for those who also wants a desk for their dolls. So please keep checking my My Etsy Shop! Chances are if I post a Set in Flickr I'd be listing it in Etsy soon. ;)


Here are some pics of the desk set.


The computer monitor is patterned from the Apple Cinema Display Monitor and is my first prototype. I didn't make a keyboard but I did include some cube speakers that is now one of my fav pieces. :)

 
I also made another set of Reading Area with cube shelves. But it also has been sold just a few mins ago. The first Reading Area set from my other post is still available in the shop. ^_^ Get it now while you can! I don't really have anymore plastic chairs to upholster, so I dunno if I can make more of those.


Here are some pics of the 2nd Set...


I think I'm getting obsessed with Murakami Art! :D

4.20.2011

Reading Area

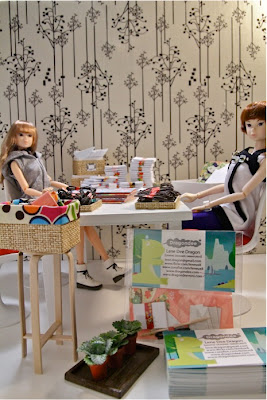
A few collectors have been asking me to make a desk for their dolls. I still have one in stock and I decided to turn it into a desk set to list in my Etsy Store. I wanted to include a book or two in the set but I ended up mass producing a few. Lol. It was just so addicting seeing all the mini books all stacked up. I couldn't resist not to take pics of them on a book shelf.


The Desk Set is nearly complete. I'll be posting pictures and listing it in Etsy by the end of this week! (Along with some new mini photo boxes and furnishings.) ^_^ Can't wait for you guys to see it!


*The knockoff looking Arne Jacobsen Egg chair is actually just one of those china made plastic cellphone holders that I upholstered with red fabric. :)